For individual Realtors®/sites built before 2019: You can change agents bio and photo under the ABOUT page, just as you would change any other content page. Click here to read how to do this.
For sites built in 2019 or after, your bios can be modified under the Agents module. The tutorial below will show you how to use this module.
NOTE: Your multi-agent module has a limited number of spots according to your proposal.
If you require more agent spots, please contact support@brixwork.com.
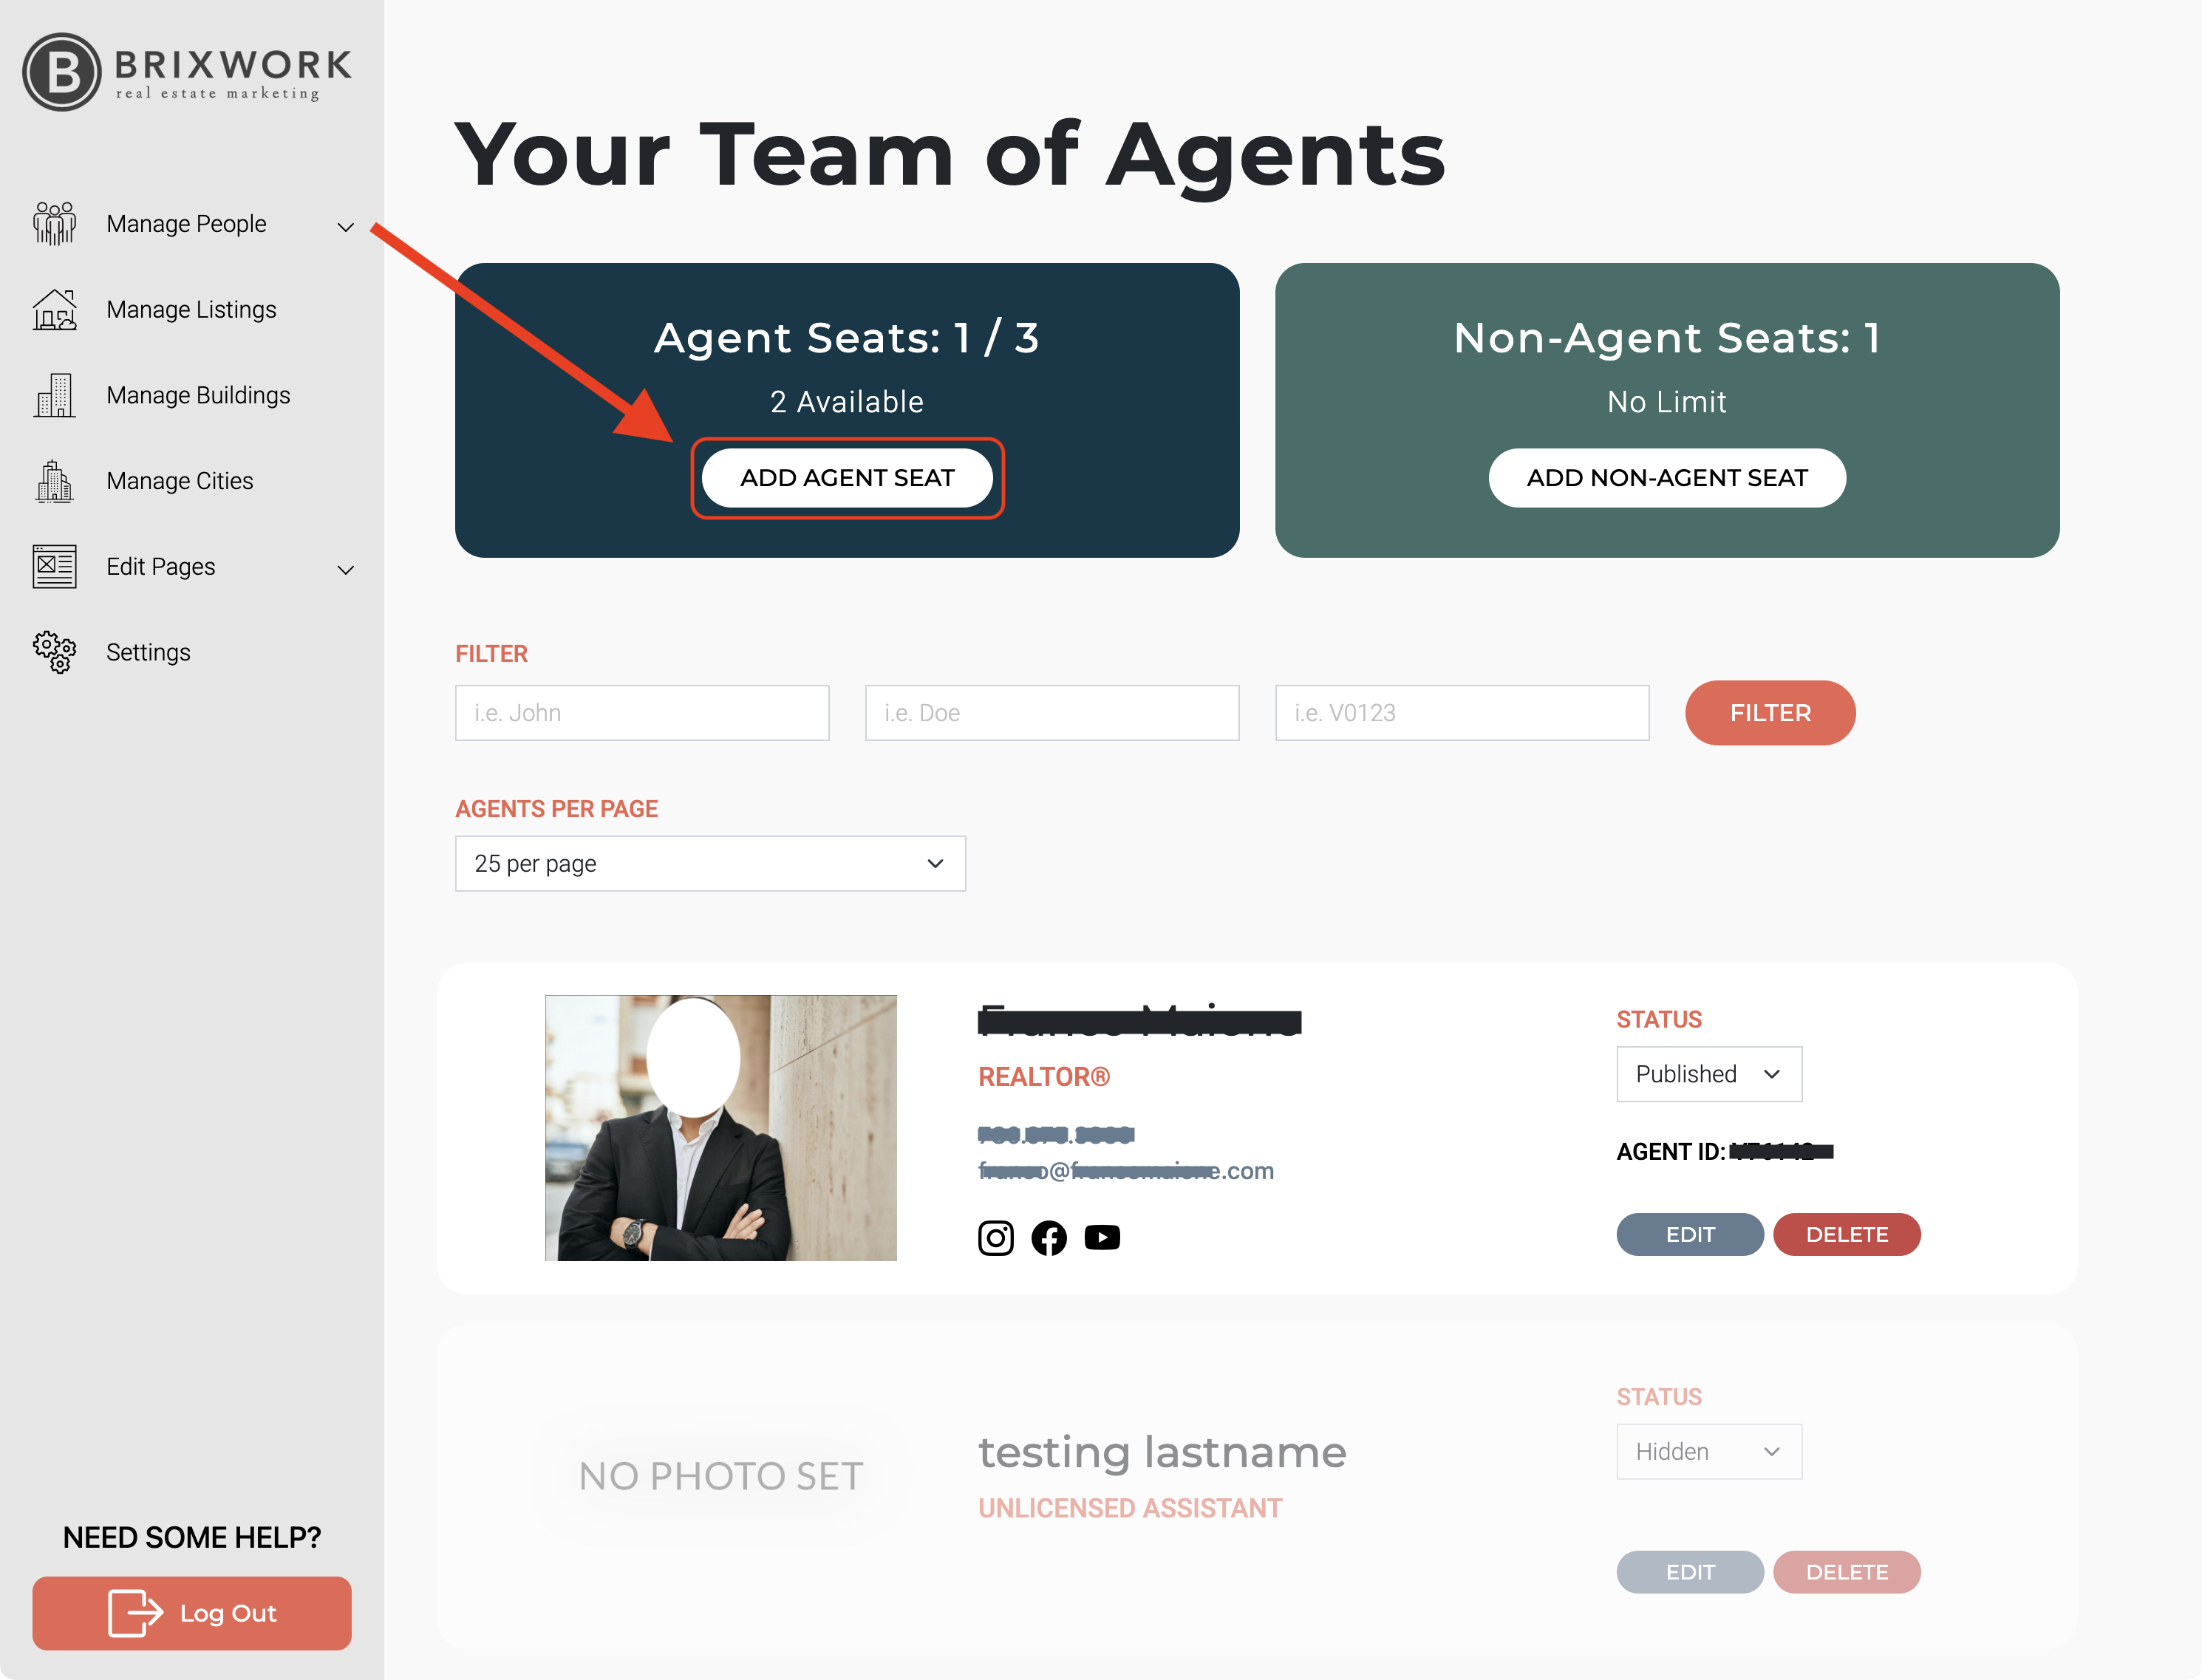
1. Go to "Agents" under the "Manage People" section on the left menu of your backend.

2. This will get into the Agents management page. Click the "Add New Seat" button.
Let's add the Information
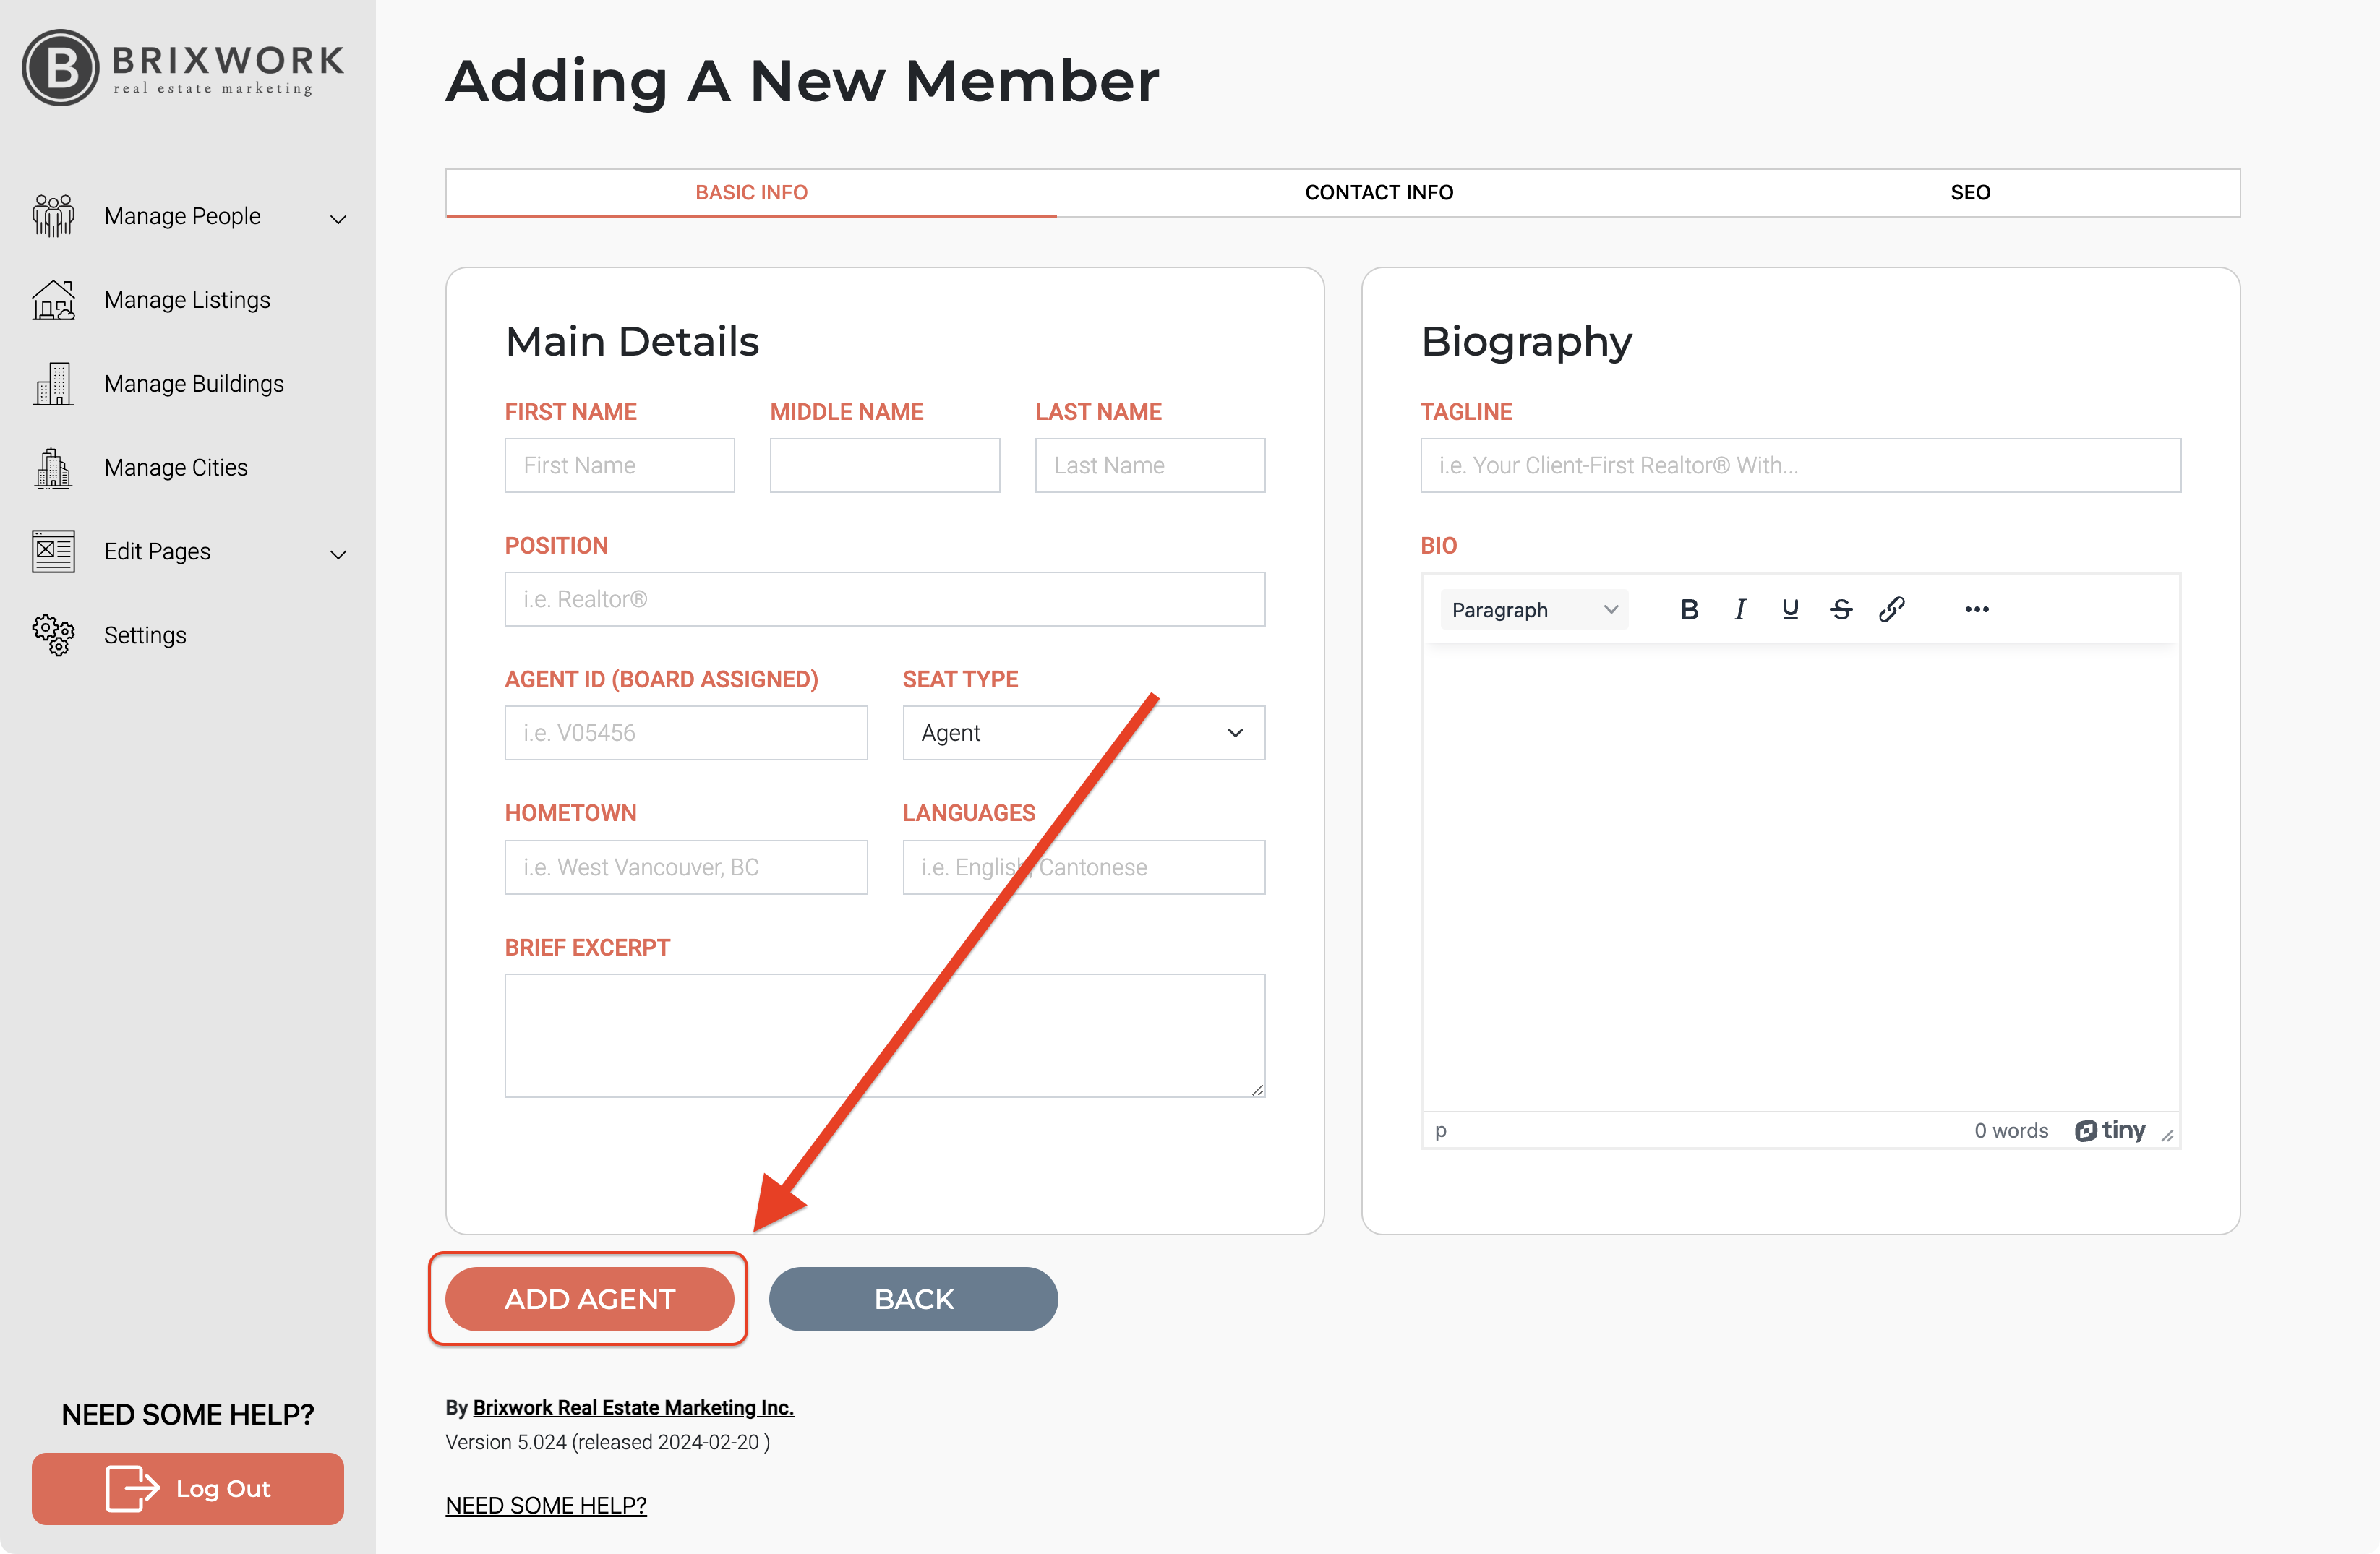
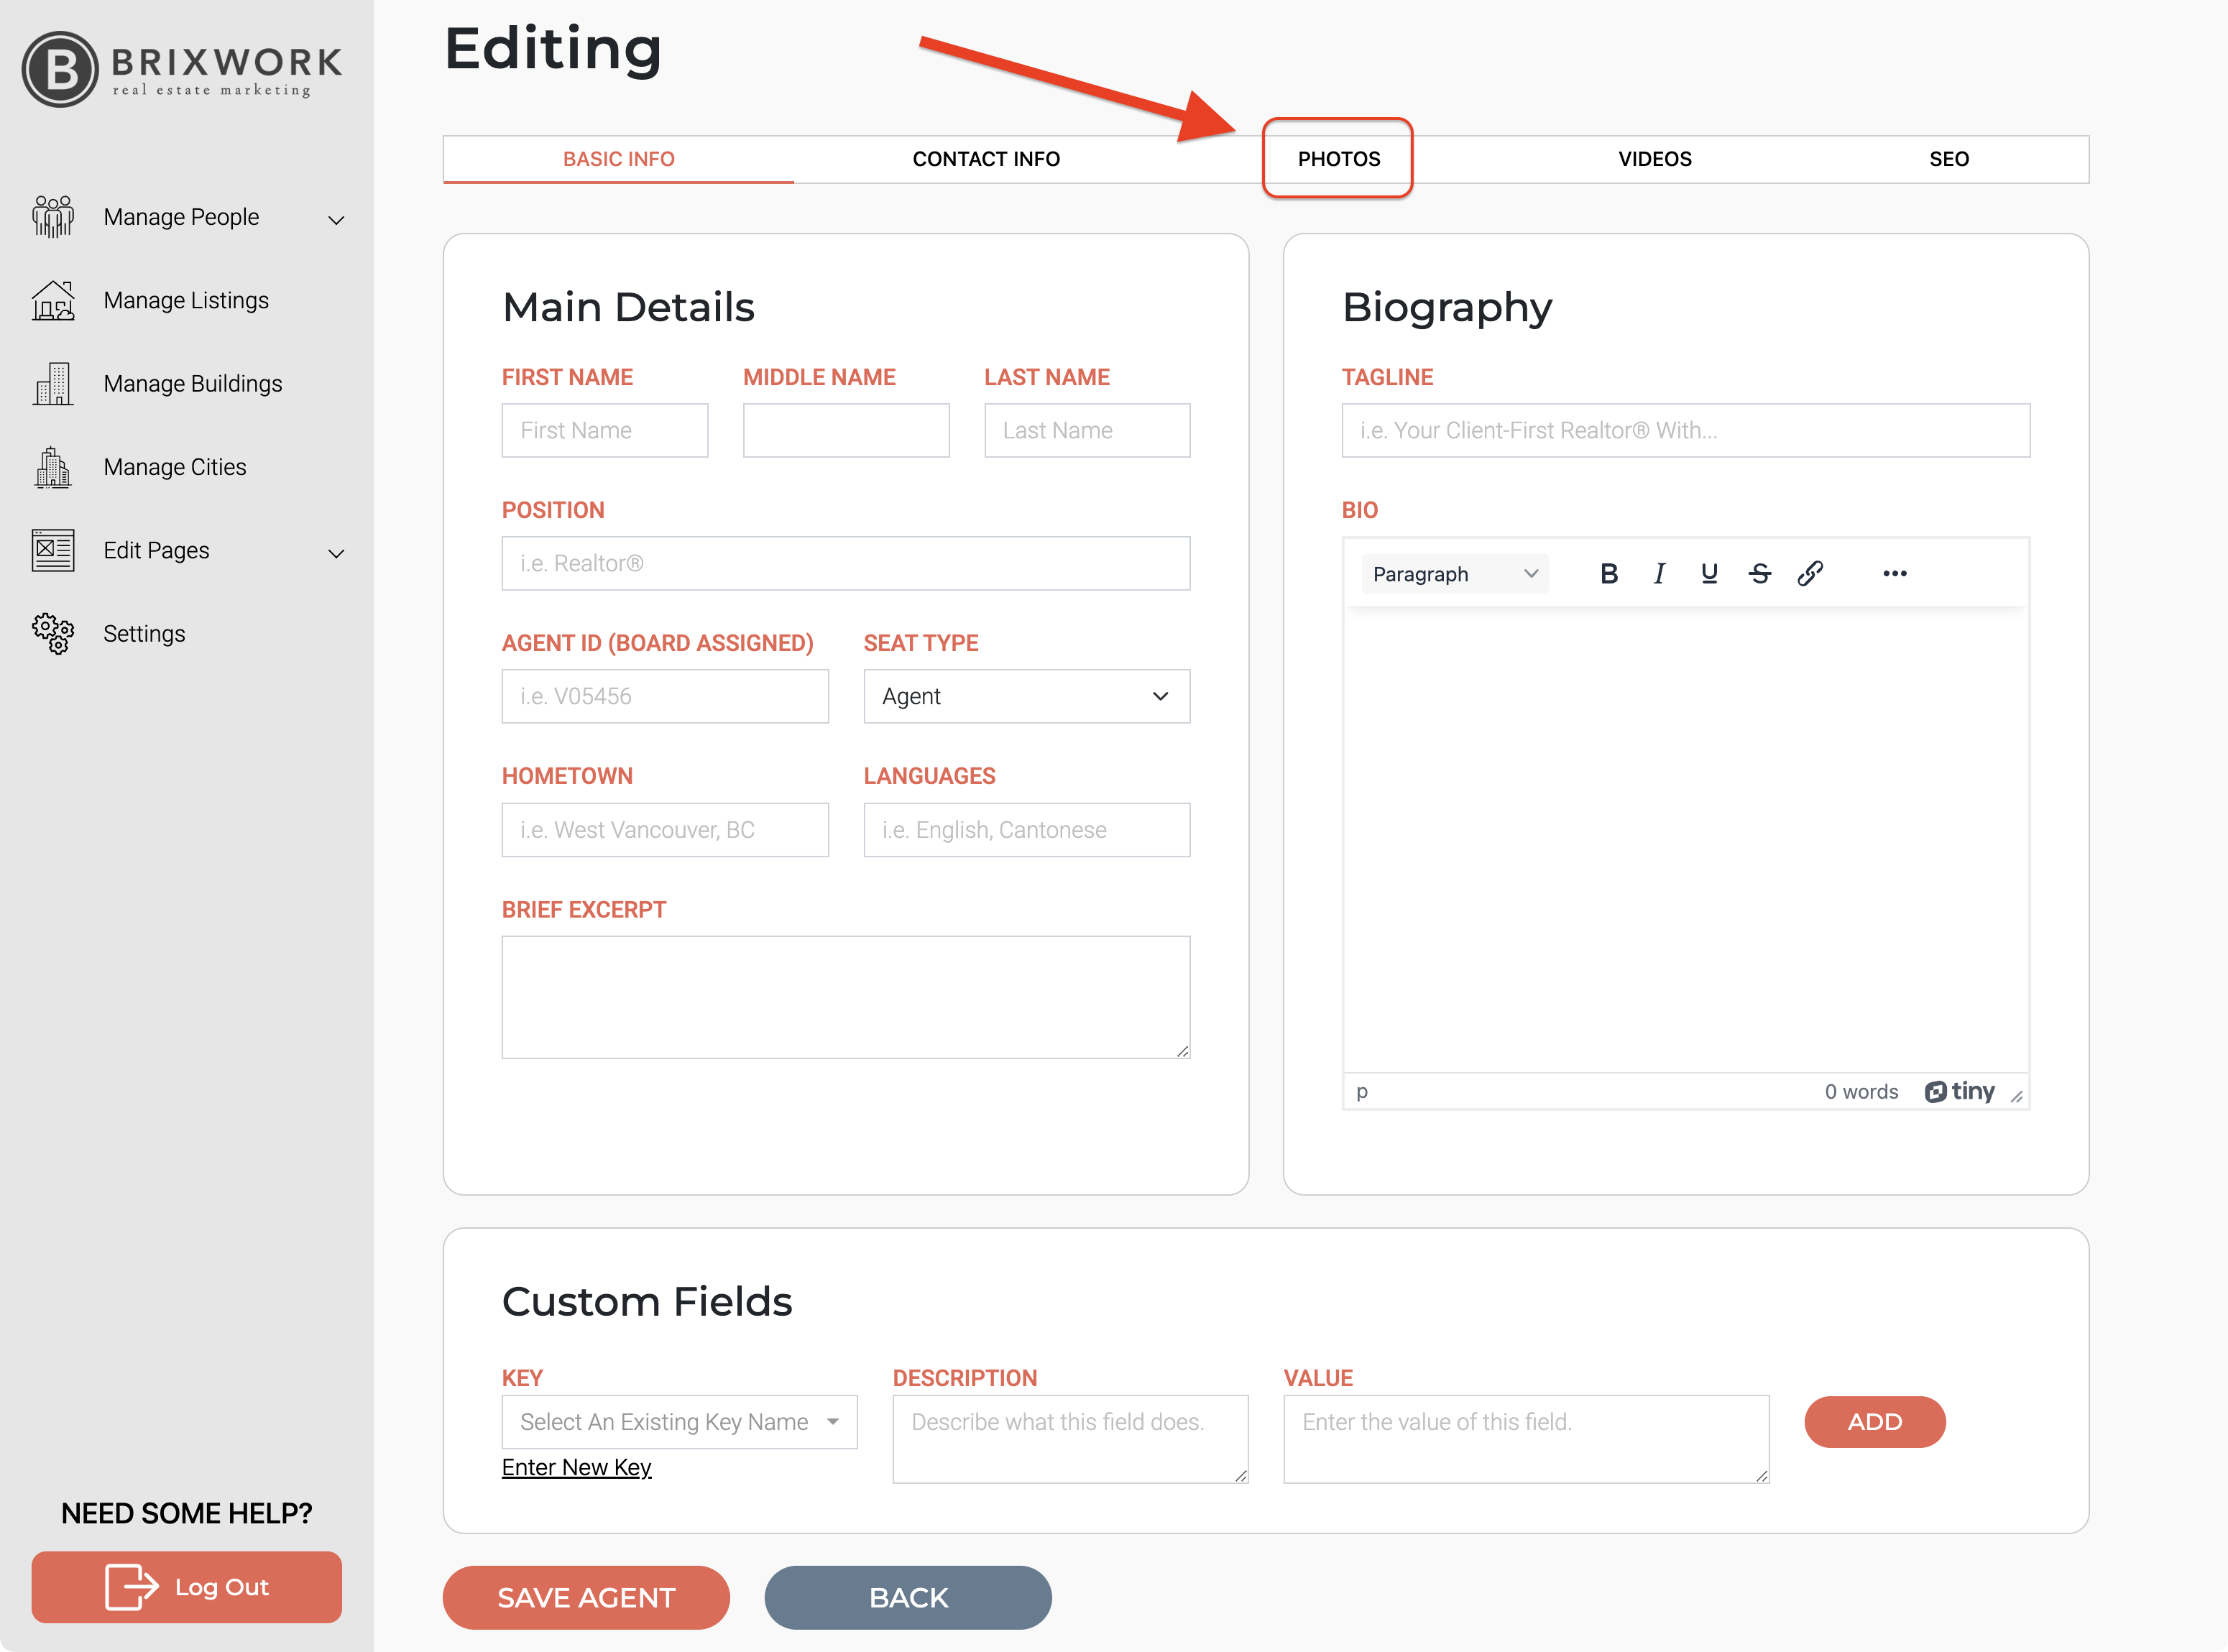
A. Start to add the full name, biography and work & background for the agent information in "Basic Info" section.
"Agent ID" can be used to auto-import MLS listings that are the agents' OWN listings. (Please note that these listings will need to be MANUALLY marked as SOLD or removed later if they do not sell).

B. In the "Contact Info" section you can add agent's basic contact information, such as phone number, email address and social media channels.
Social media profile links: not all websites have this shown/activated on the front-end, and may default to the site-wide ones set at the "Settings" -> "Social Settings" tab.

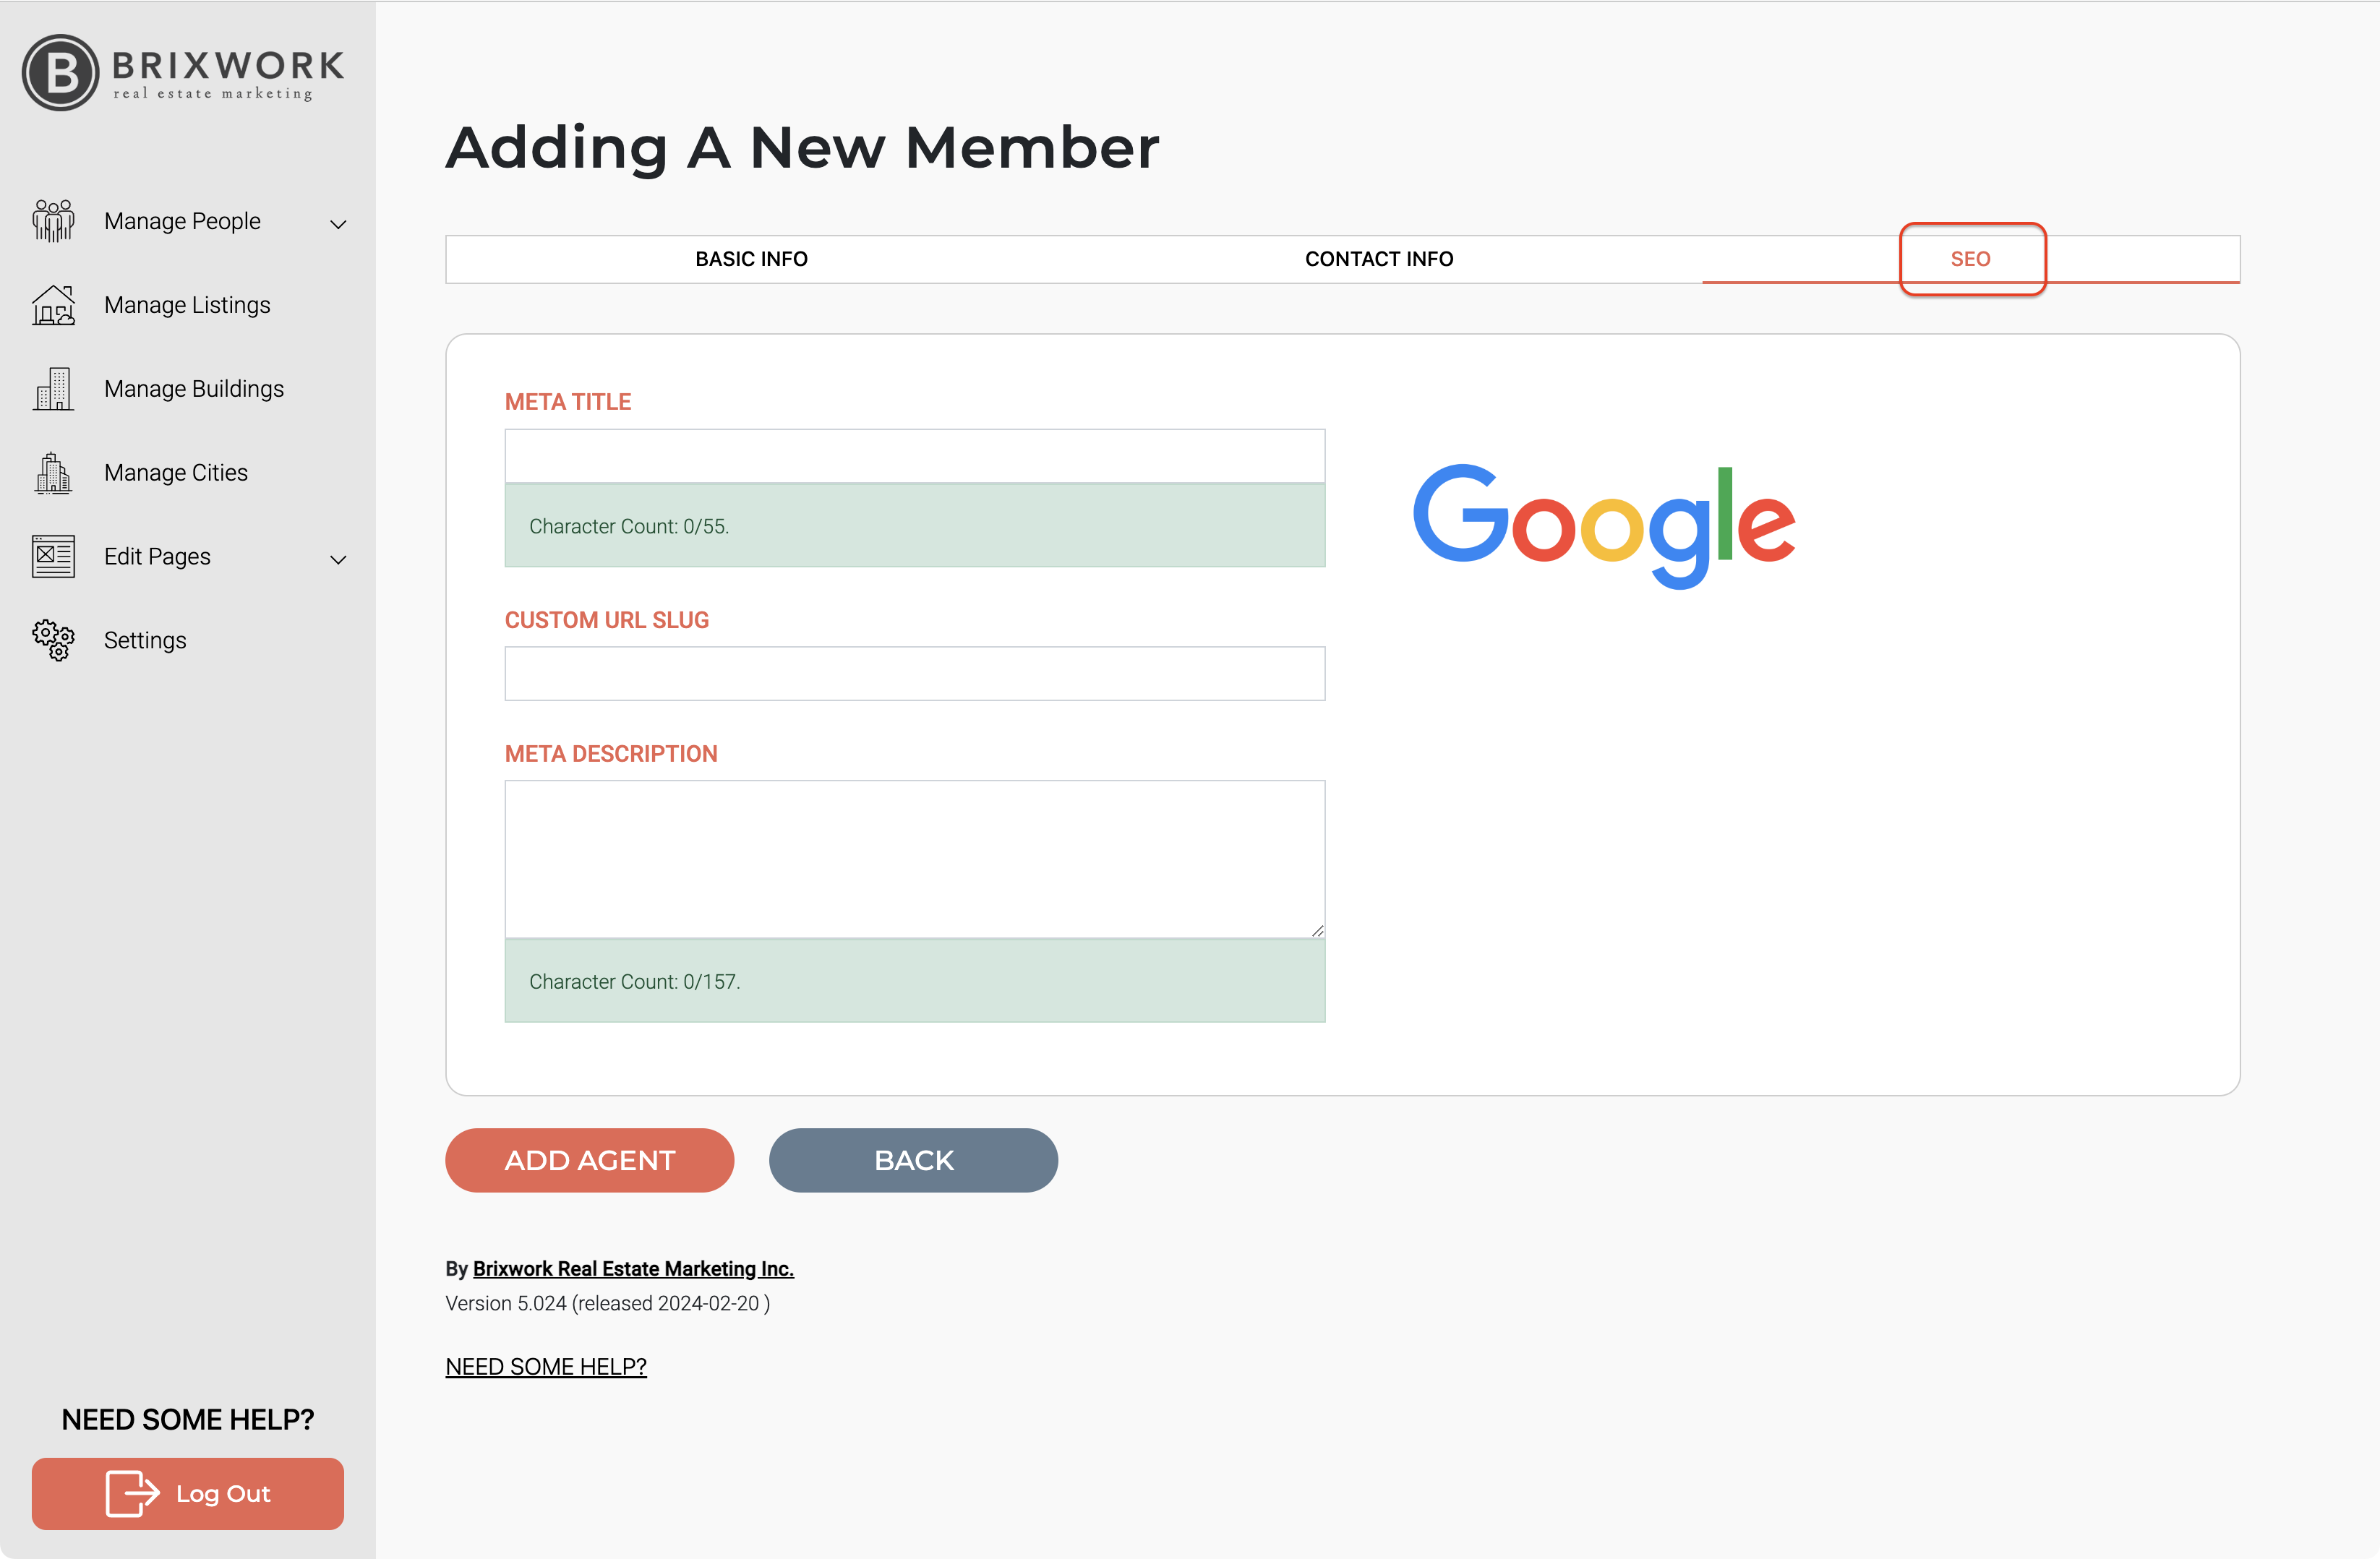
C. The "SEO" section can help your website get a better ranking on this page with good keywords. This section is optional.
D. Once you have finished DON'T FORGET to click "Add this Agent" at the bottom of the page.
Editing an existing Agent's information
1. To edit the Information of an agent just click the "Edit" button

2. When you finish updating the information, don't forget to click "Save Agent" at the bottom of the page.
Uploading an Agent's headshot/picture
1. On Editing page, go to "Photo" tab.
2. Here you can drag and drop the picture you want to use or click on the "Select Files" to get a prompt to select from your folders. Once your picture has uploaded, you will be prompted to crop it so it fits your site's design measurements. After you crop it, it will automatically save.

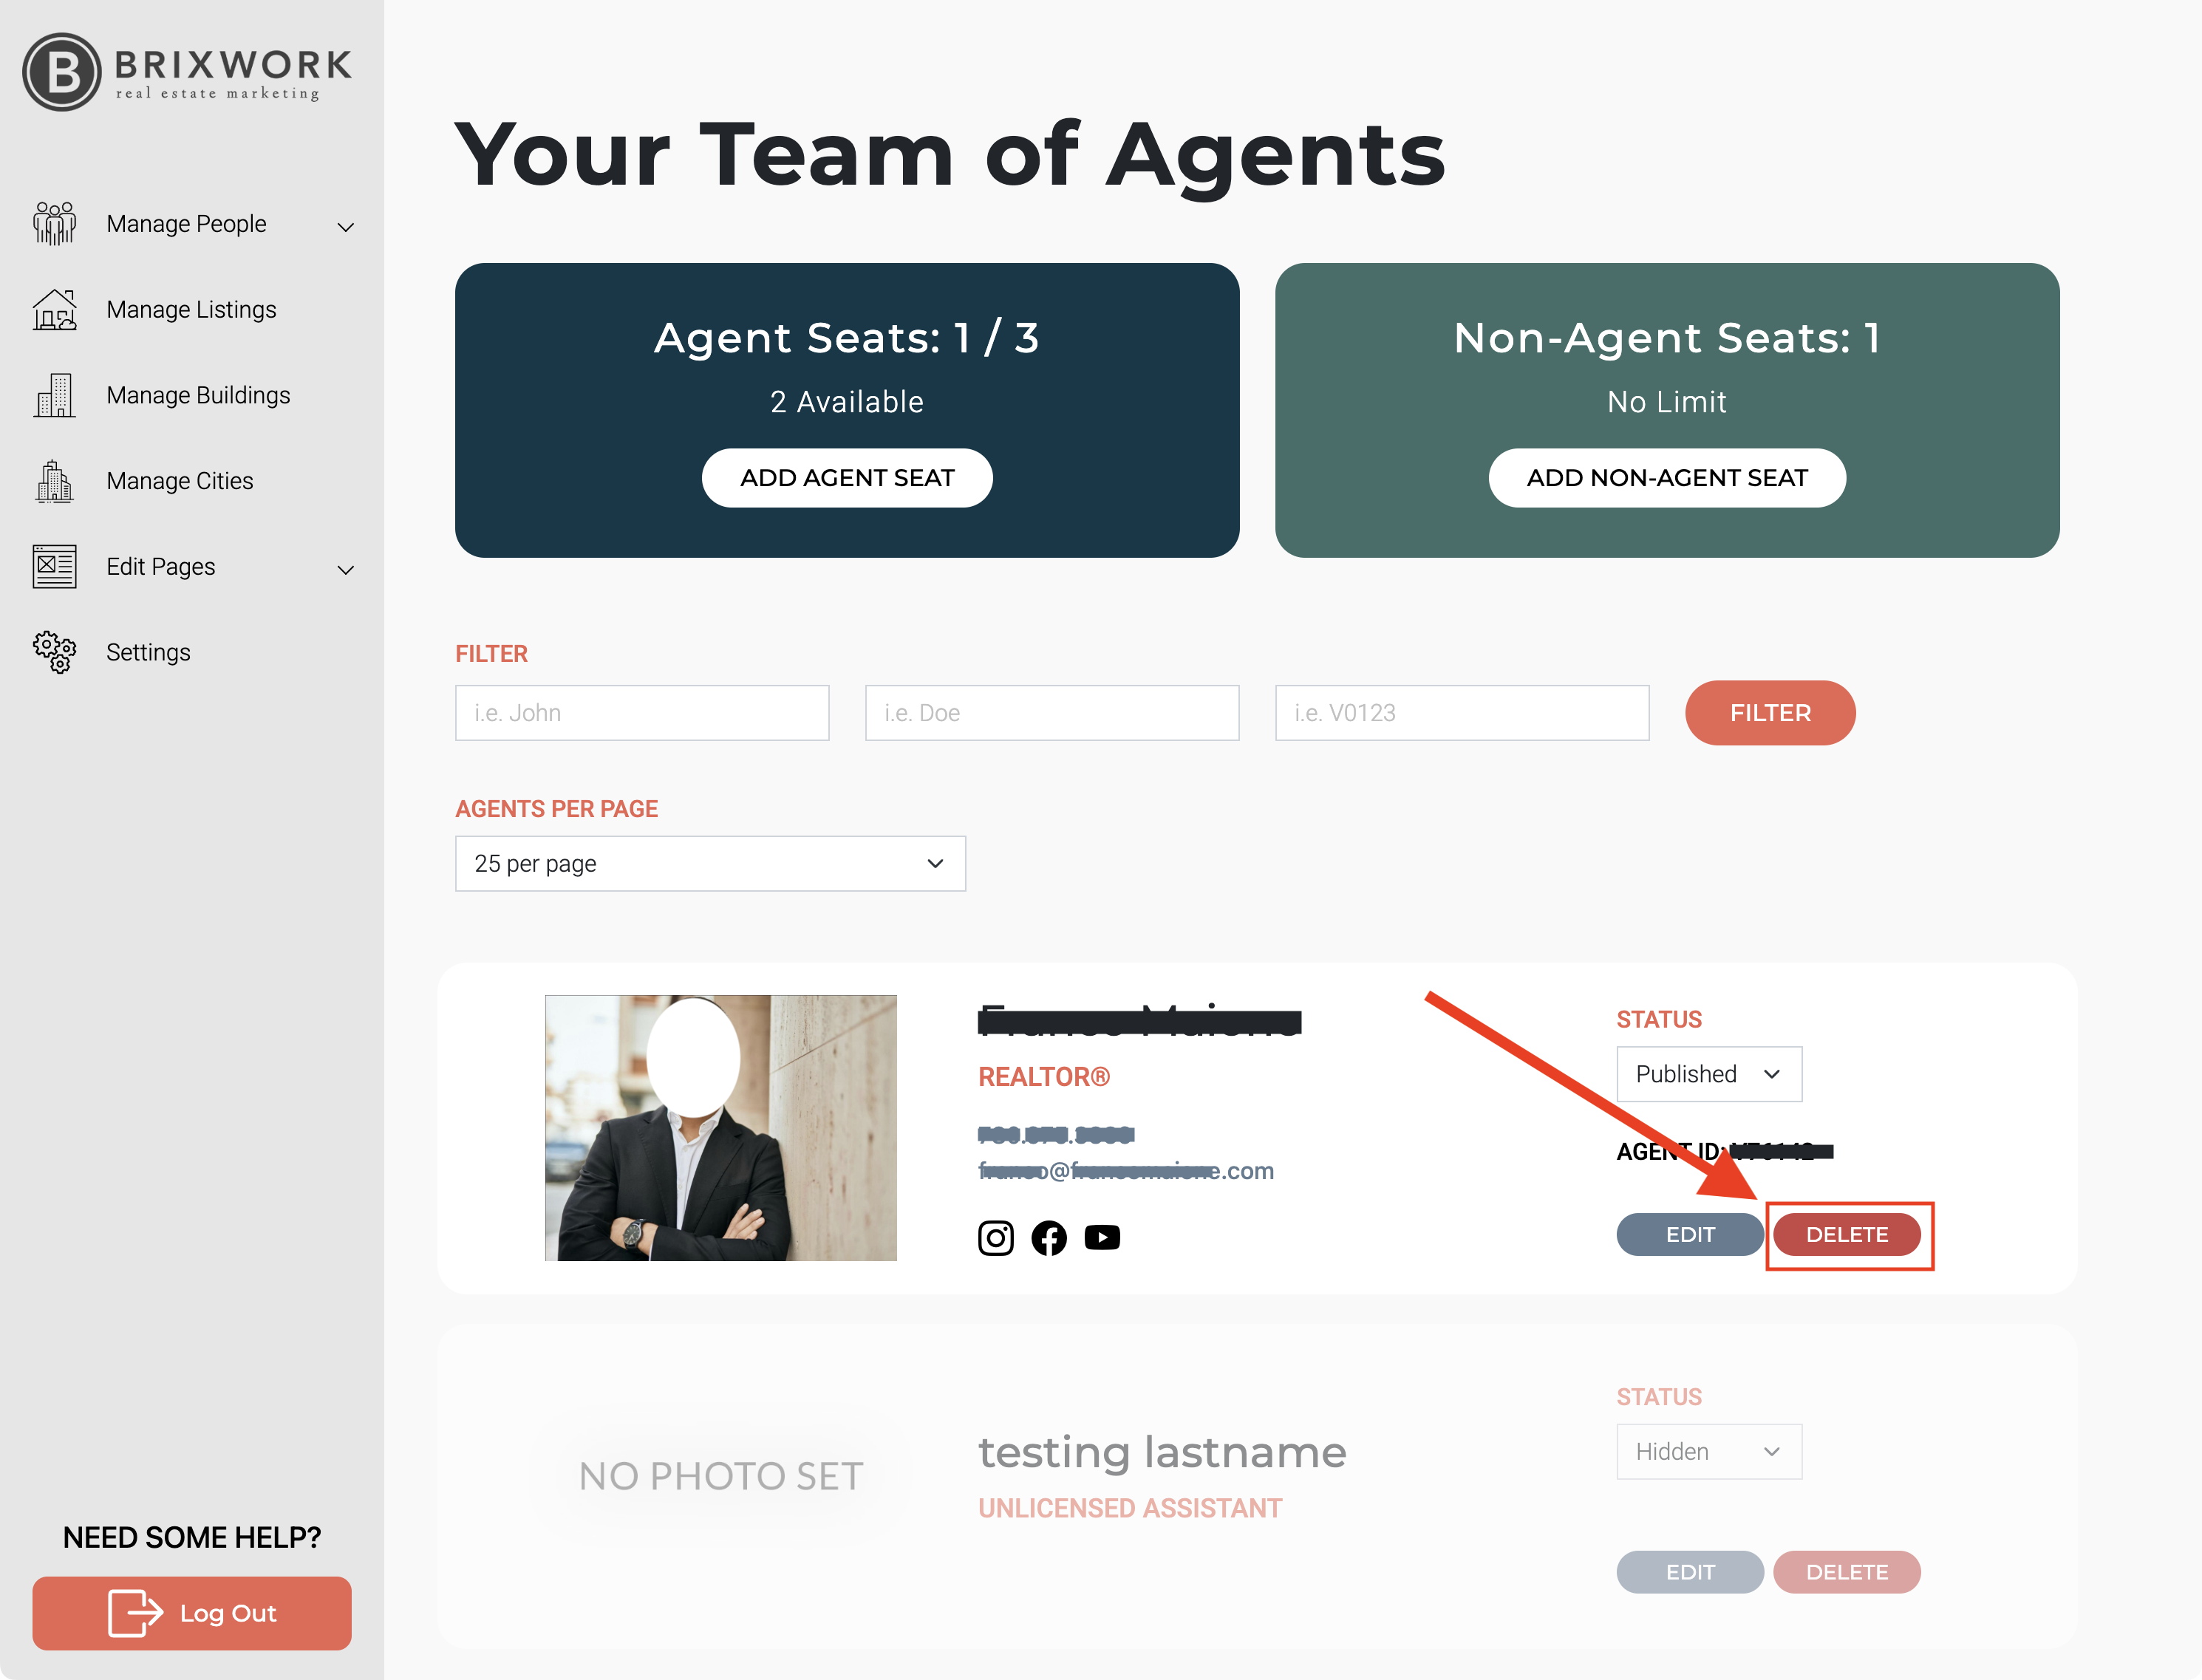
Removing an Agent
To remove an agent, you just have to click the red button with a "-" next to Edit.